

How To Add Divi Builder To A Custom Template File
Welcome to Day 3 of 3, the terminal solar day in our series on How to Add Custom Styles to Divi's Weblog Postal service Formats. Past default Divi comes with half dozen web log post formats: Standard, Video, Audio, Quote, Gallery, and Link. In this series nosotros teach yous how to customize them with php and css.
Today is the terminal day of our series on how to add custom templates and styles to Divi'due south blog post formats. This final 24-hour interval of the series is defended to design. With our unmarried.php customized and our kid theme agile, nosotros are set to add styling to the blog post formats.
I volition walk you lot through all half-dozen post formats as we add some unique design touches to each 1. By the terminate of this tutorial, you will have six great looking alternatives to the default web log post formats that Divi comes with.
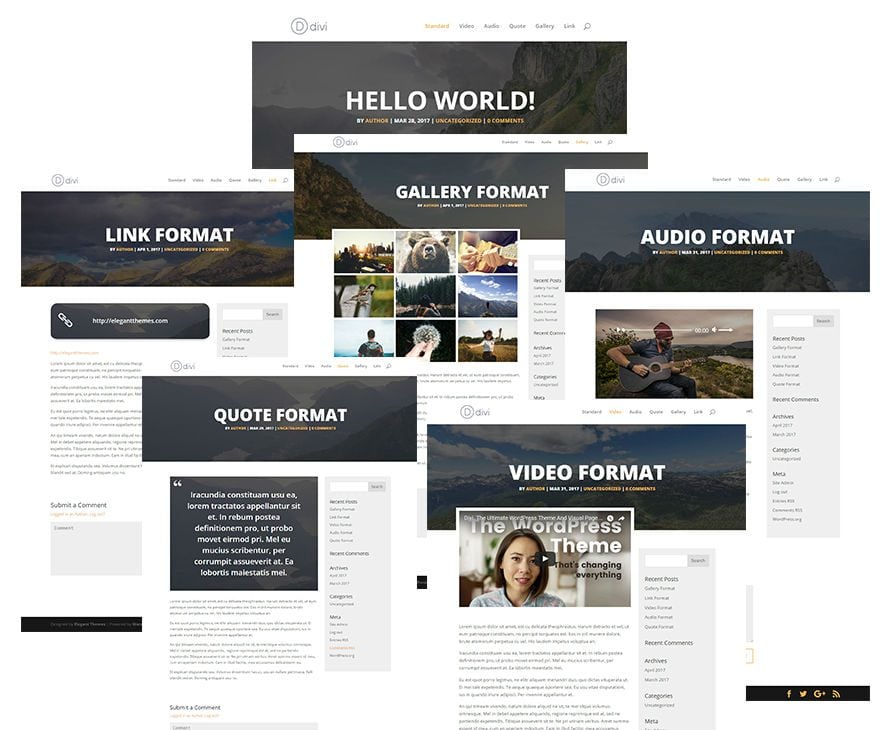
You will likewise have a pretty unique web log page that displays the unlike post format featured elements. For instance, the link format will brandish a custom link box in place of the featured prototype thumbnail. The gallery format post will display an prototype slider of your gallery images in place of the featured paradigm thumbnail. And, and so on.
Here is a glimpse of what your blog page would expect similar after today's tutorial (I'm using the Divi Blog Module with a grid layout in the gif below).
Let's get started.
Setting Up General Design Settings in Theme Customizer
Kickoff we demand to make a few general fashion changes using the theme customizer. From your WordPress Dashboard, go to Divi → Theme Customizer → General Settings → Layout Settings and change the following:
Website Gutter Width: ii
Cheque Use Custom Sidebar Width
Sidebar Width: 30
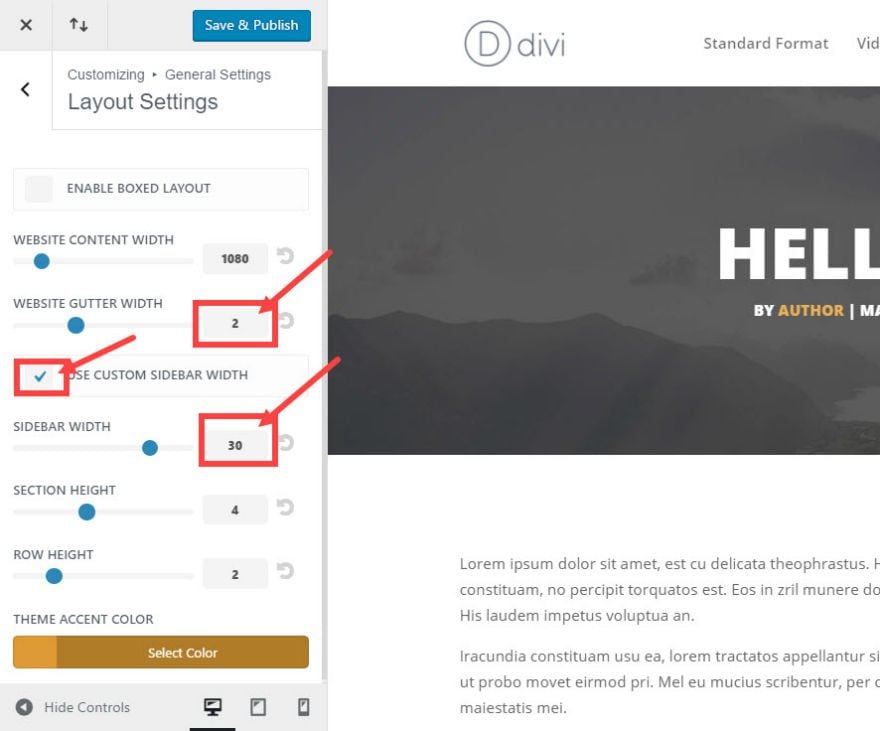
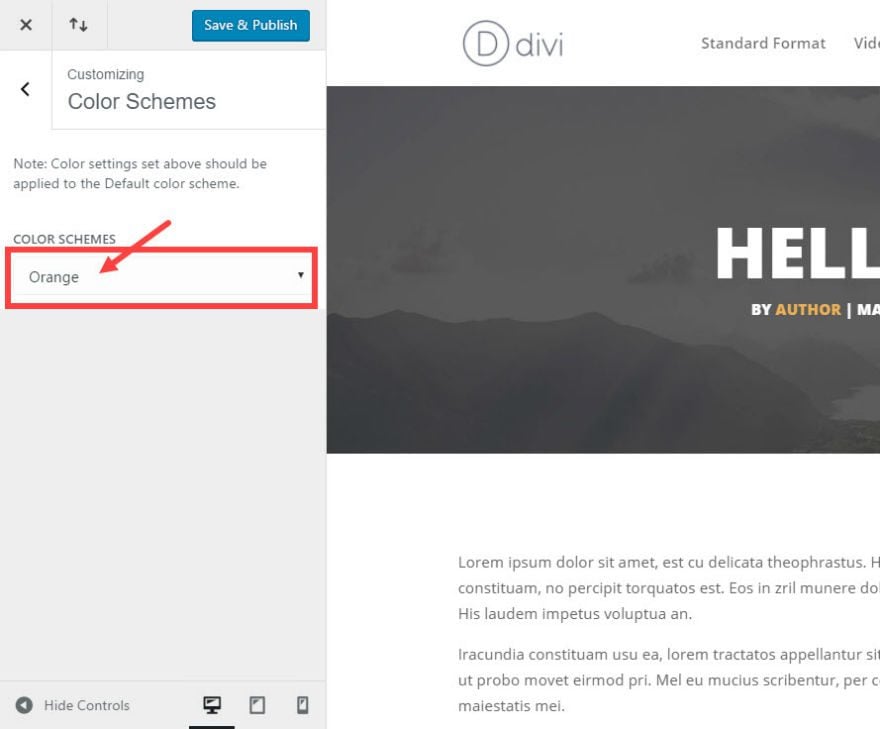
Also under Theme Customizer, go to Color Schemes and select Orange.
At present let's take a look at what your standard postal service looks like and so far:
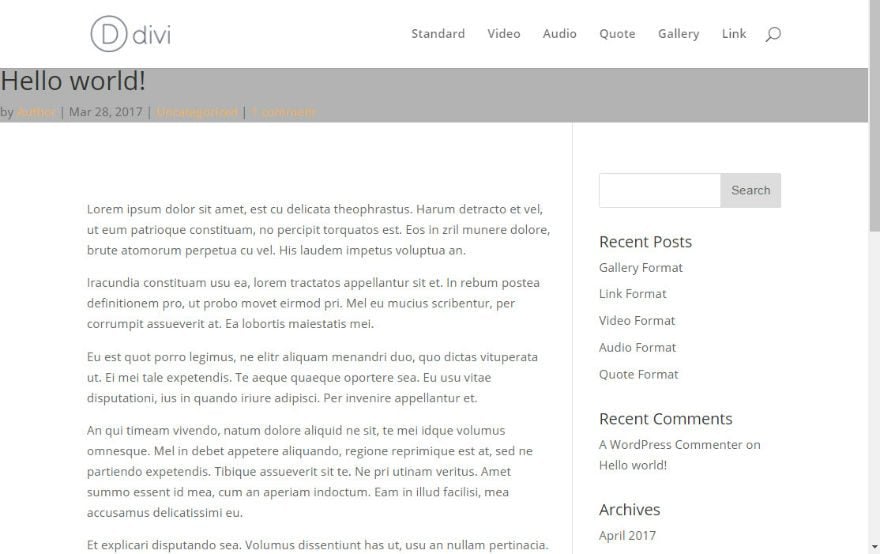
Equally you can tell, it still needs some styling but everything is in the right place. Y'all accept a hero section spanning the full width of the page. You don't accept a featured paradigm nonetheless so the background is only showing the gradient you added to your single.php file earlier. Likewise the post title and meta are inside the hero section. Now it is fourth dimension to add the rest of the design elements.
Styling the Hero Section for all Mail service Formats
Since each of your mail formats volition share the same hero section and sidebar design, y'all tin can add this custom CSS showtime. Go to back to Theme Customizer, click Additional CSS at the bottom, and add the following custom CSS:
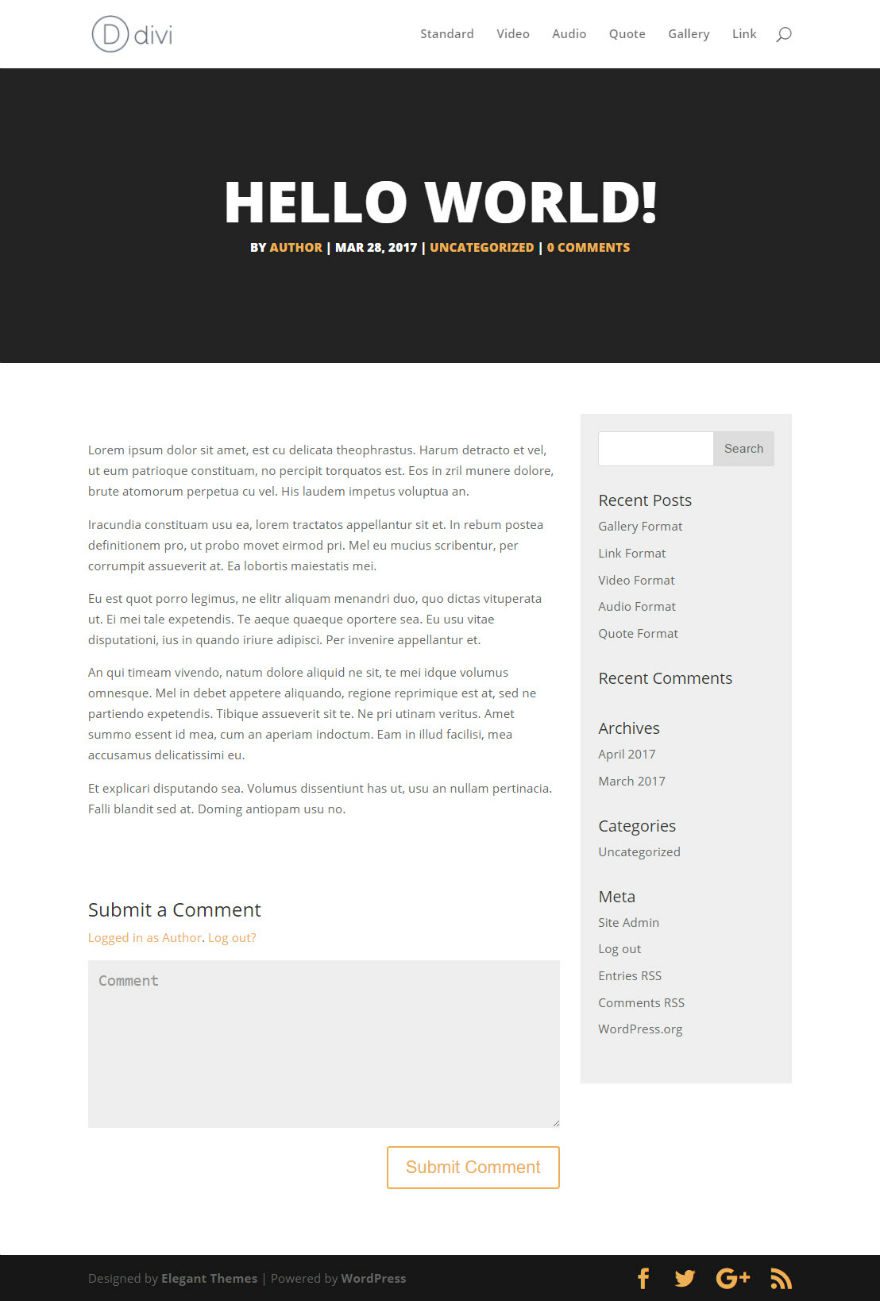
.hero-section { padding-top: 120px; padding-bottom: 120px; background-echo: no-repeat; background-size: embrace; position:relative; max-height: 450px; groundwork-colour: #333; } .single-post #main-content #left-area {padding-elevation: 0px;} /* ---- Sidebar Settings ---- */ .unmarried #sidebar {groundwork: #efefef; padding-pinnacle: 20px; padding-correct: 20px; padding-left: 20px; padding-bottom: 20px;} /* ---- Standard Post Title & Post Meta ---- */ .unmarried h1.entry-championship,.zipper h1.entry-championship, .single p.post-meta { width: 100%; text-align: heart; padding-left: 8px; padding-right: 8px; font-weight: 800; text-transform: majuscule; color: #fff; } @media only screen and (min-width: 980px) { /*** Set title font size for desktop ***/ .single h1.entry-championship { font-size: 65px !important; } } At present bank check out what a standard post looks like now.
With the hero section and sidebar styling in identify, yous are ready to style the individual mail formats.
Styling the Standard Postal service Format
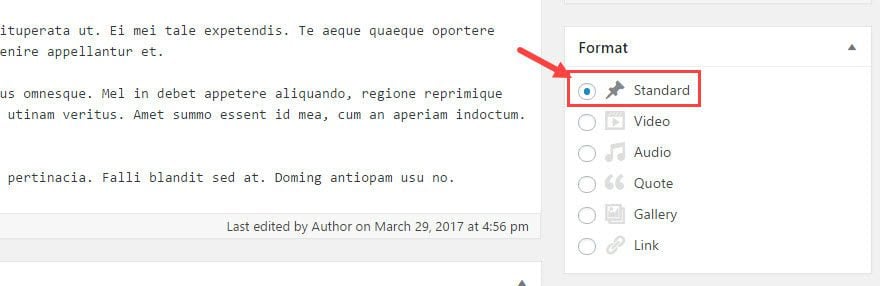
The standard mail service format is the default format for all of your blog posts. Yous can select the standard postal service format when editing your post.
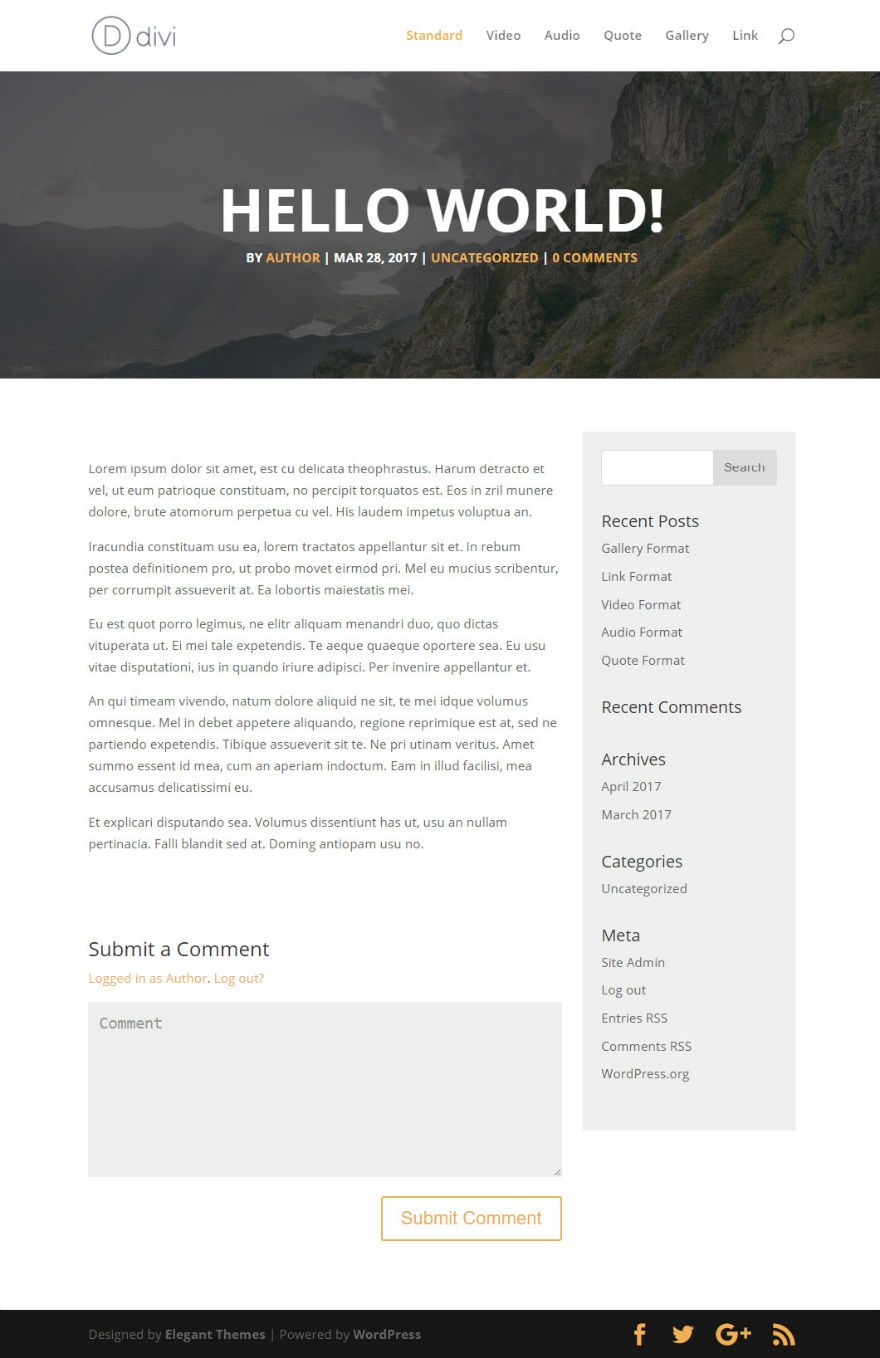
All we are going to do for this standard format is add the featured epitome. Because this featured epitome will stretch the entire width of the screen, I propose using an paradigm that is 2000 10 600. I'm using images from unsplash.com.
After yous add together your featured image, cheque out what the standard post looks similar.
Styling the Video Post Format
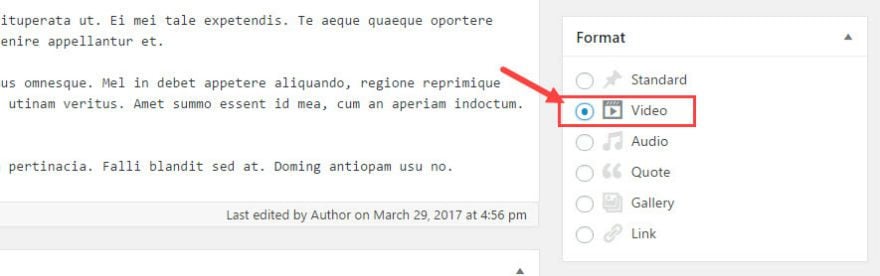
To way the Video Post Format, make sure yous have the Video format selected for your post.
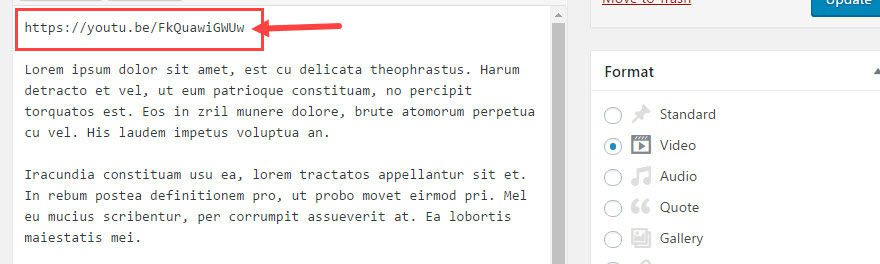
Adjacent, add the url or embed of a video to your content. The video format will take the showtime video url, video tag, or embed and display it at the top of your post content. This video will besides supplant the featured prototype on your blog page.
For this example, I'm merely using a youtube video url.
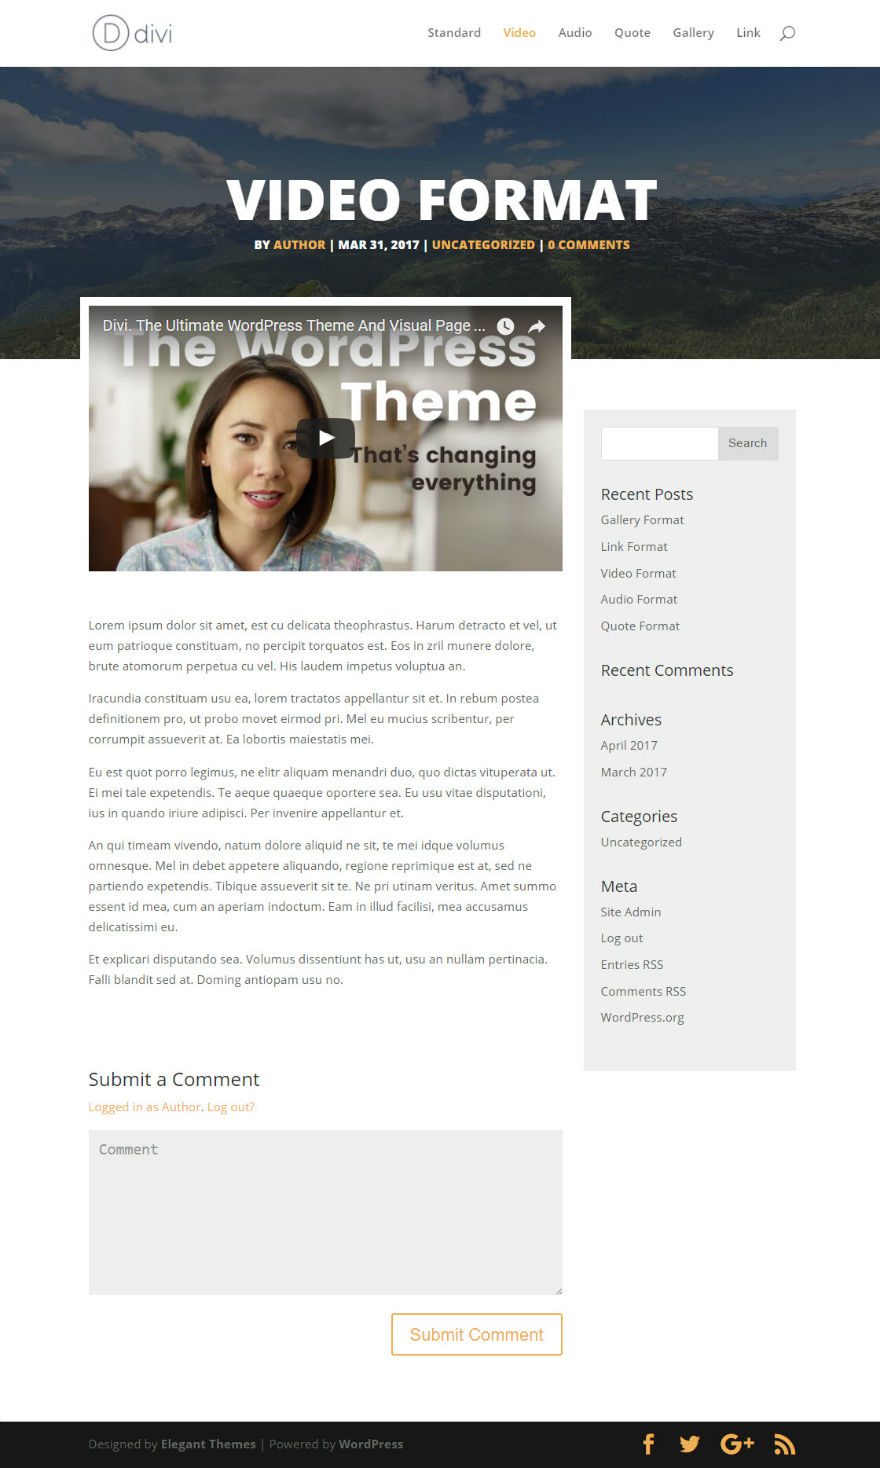
Add your 2000 ten 600 featured image to the post.
Next, we are going to add additional styling to the featured video to give the video a white border and elevate it slightly so that information technology overlaps the hero section and stands out a flake.
Get to Theme Customizer → Additional CSS and add together the following custom CSS:
/* ---- Format the Position of the Video Wrapper ---- */ @media only screen and (min-width: 980px) { /*** elevate the video to overlap the hero department ***/ .single-mail service.single-format-video .et_main_video_container {margin-height: -120px; background: #fff; outline: 10px solid #ffffff !important; z-alphabetize: 100; margin-bottom: -100px;} } At present check out your new Video Format post.
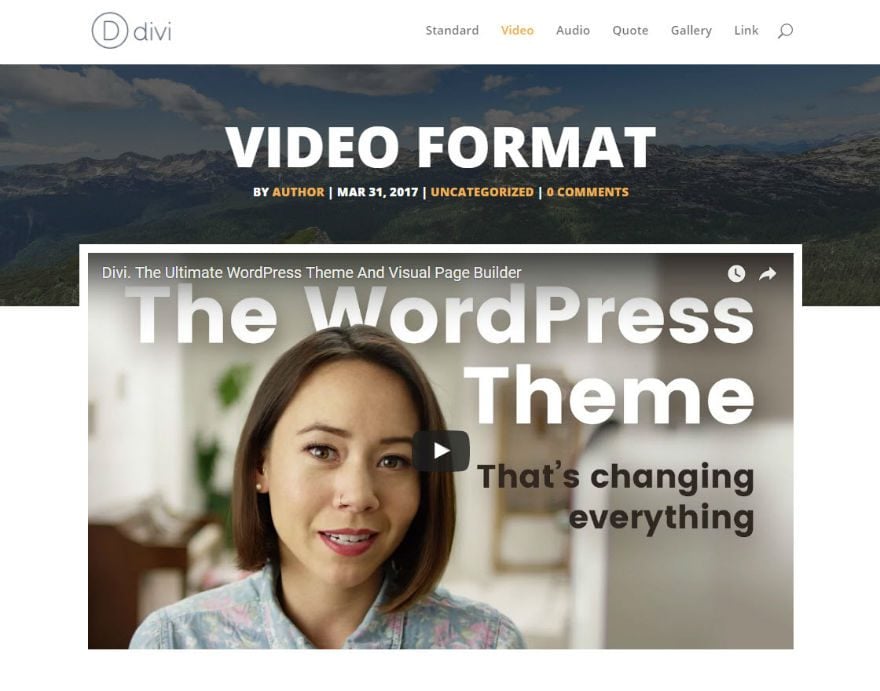
Alternatively, y'all could make this post fullwidth for another nifty pattern option. Just go to edit your post and, in the Divi Postal service Settings on the top right of the page, select a fullwidth page layout.

Now check out the full width Video Format post:
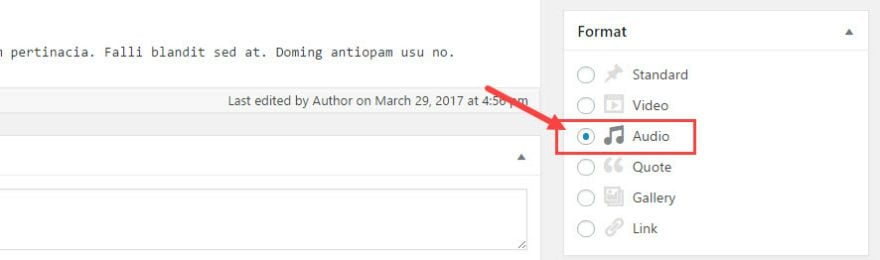
Styling the Audio Postal service Format
For the Audio Mail Format, brand sure y'all take Sound Format selected for your mail.
Add your 2000 x 600 featured image.
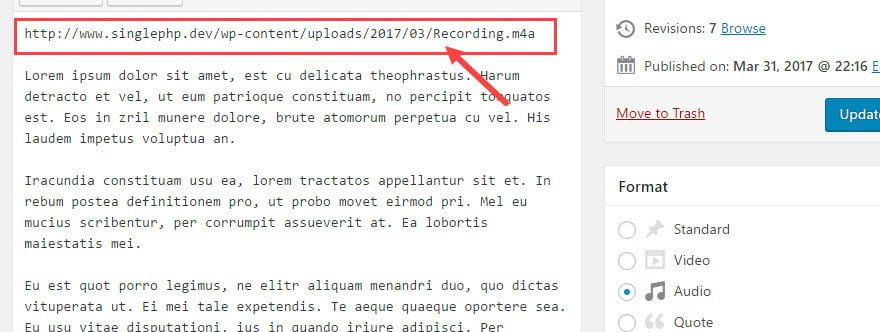
Next, add your sound file to your mail service. This can be a .mp3, .m4a, .ogg, or .wav file. Y'all tin upload your audio file to your media library and insert to your post in three unlike ways (embed media player, link to media file, or link to attachment page).
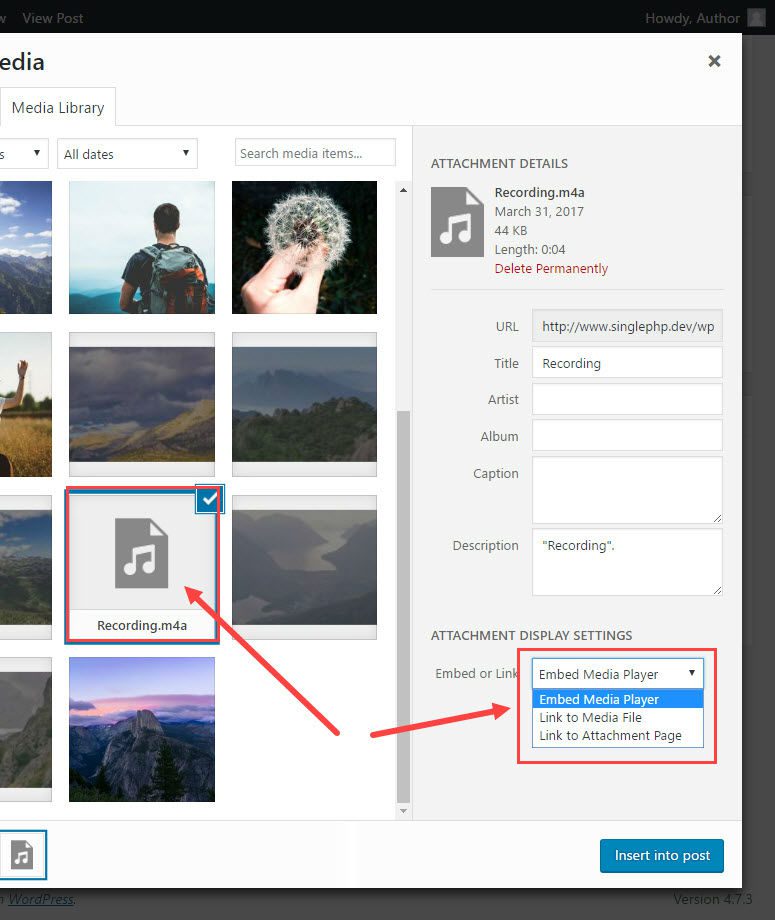
Any of these three options will work. But, for this instance I'chiliad just going to add a simple url to the sound file. WordPress volition catechumen this audio url into a media player at the top of the post.
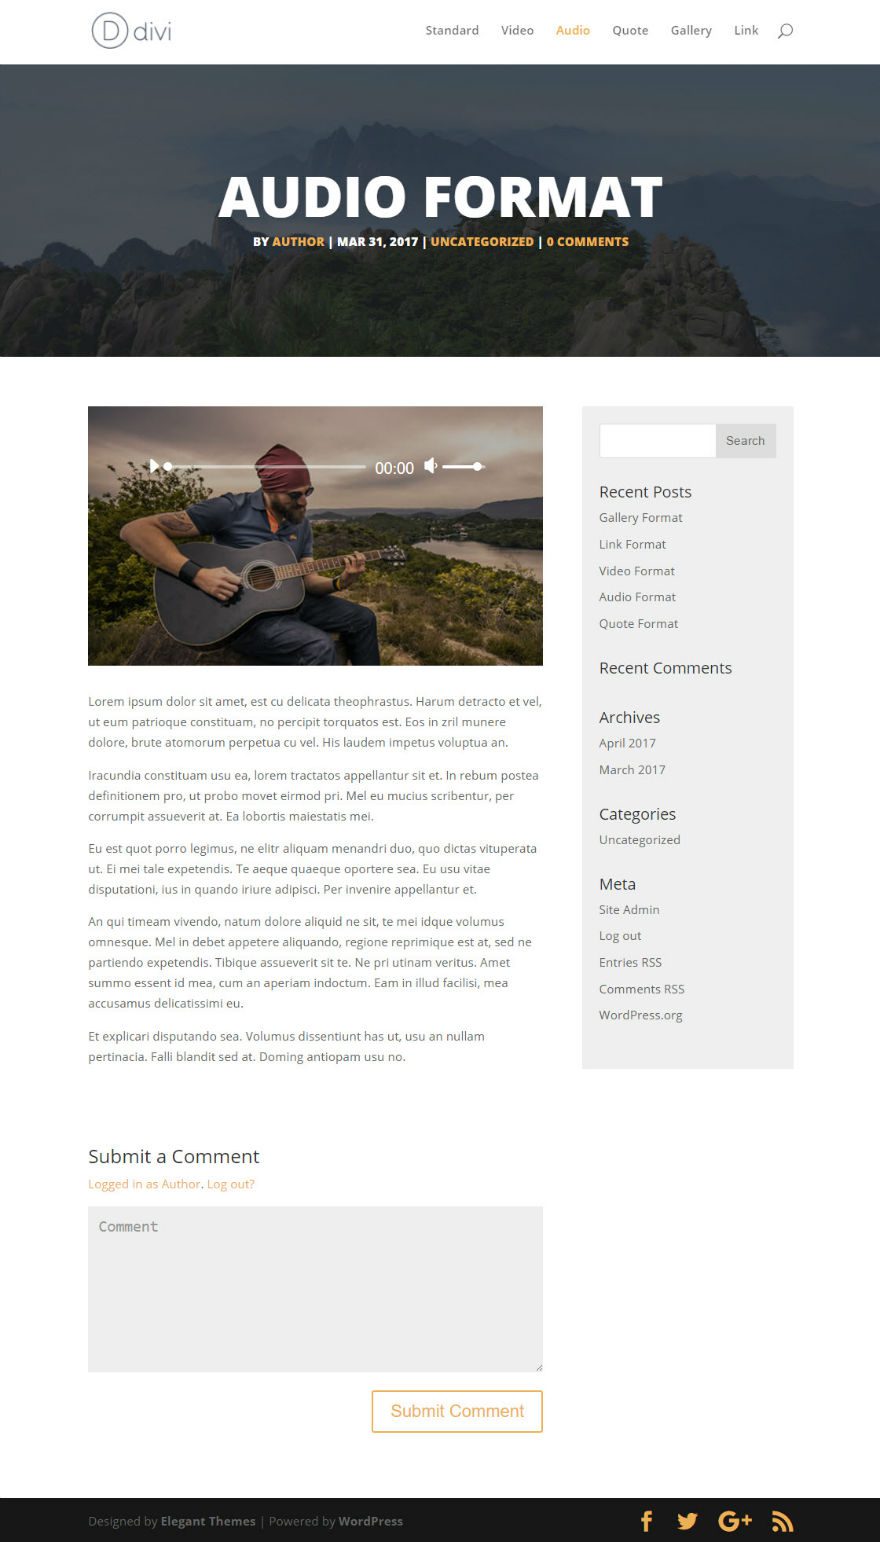
Now let's take a look at the Audio Format mail.

That's bully, but it could be better. Let'south hide the indistinguishable media role player that shows beneath the orange media player and add together a background image to our the orange media histrion.
Go to Theme Customizer → Additional CSS and add together the following custom CSS:
/* ----- Add together Background Prototype to the Audio Player & Change size of the player ----- */ body.unmarried .et_audio_content, .blog .et_audio_content { margin-bottom: 0px !important; height: 300px !important; groundwork-epitome: linear-gradient(rgba(0,0,0,0.3),rgba(0,0,0,0.three)), url('ENTER Image URL Here'); groundwork-repeat: no-repeat; groundwork-size: embrace; } /* ---- Hide the Duplicate Audio Player ------ */ div#mep_1 {display: none;} So find and upload an prototype to your media gallery (should exist effectually 700 x 300). Then copy the url and paste in the CSS above where information technology says "ENTER IMAGE URL HERE".
background-image: linear-slope(rgba(0,0,0,0.3),rgba(0,0,0,0.3)), url('ENTER Epitome URL Here'); Now become bank check out your new Audio Format post.
Styling the Quote Mail service Format
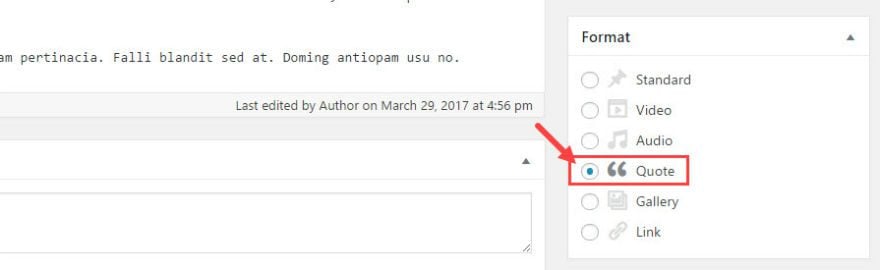
For the Quote Post Format, make sure you have the Quote Format selected for your post.
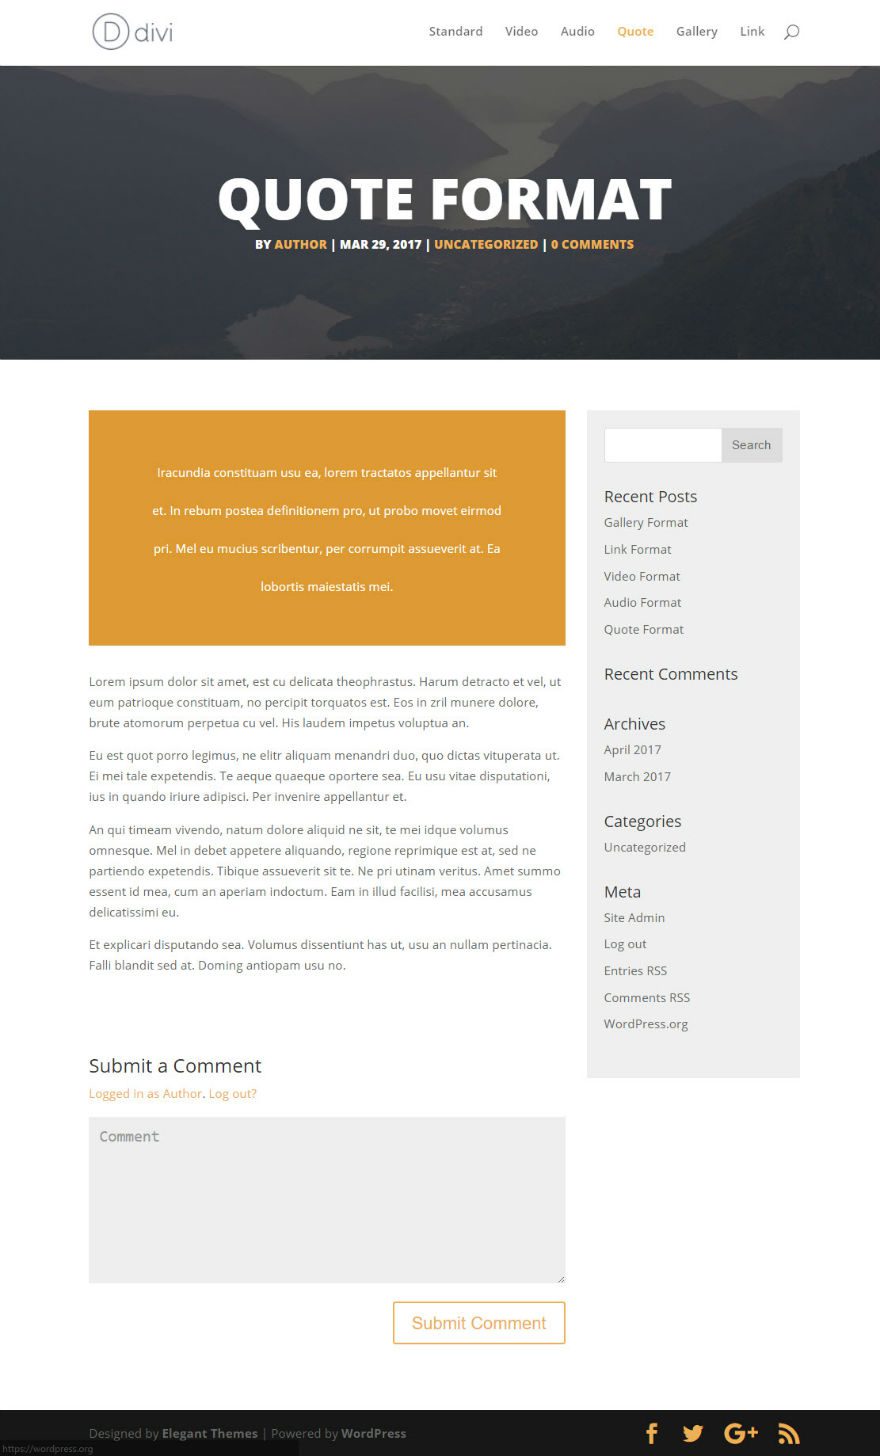
So add a 2000 ten 600 featured image to the post.
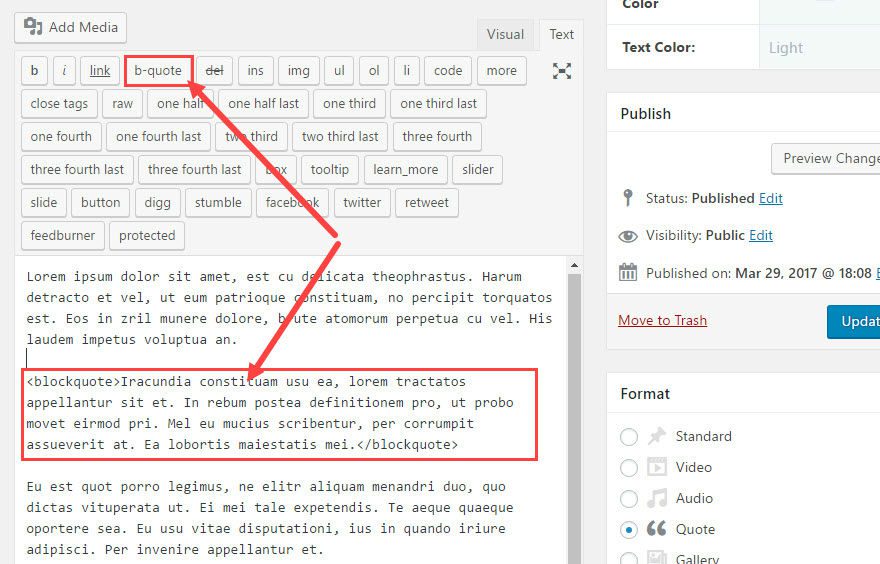
The quote format utilizes the blockquote shortcode to generate a custom quote brandish. And so, add a blockquote to your content for the custom quote to exist displayed.
At present check out your post.
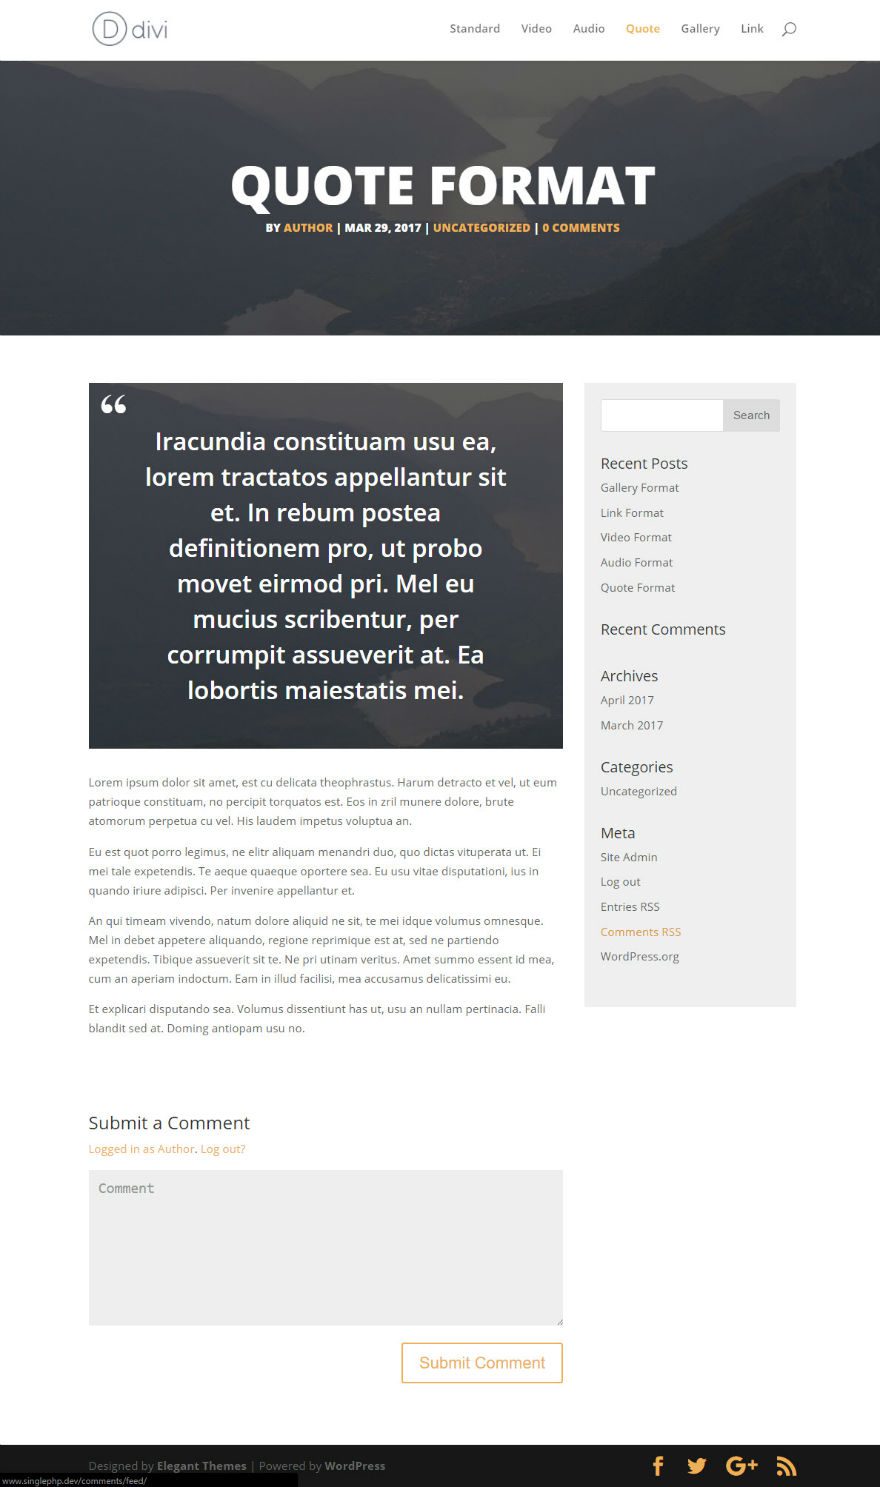
Let's customize the featured quote box with a little CSS to give it a background prototype and large quotations on the summit right.
Become to Theme Customizer → Boosted CSS and add together the following custom CSS:
/* ---- Add together Background Image to the Quote Box ---- */ .et_quote_content { background-image: linear-gradient(rgba(0,0,0,0.3),rgba(0,0,0,0.3)), url('ENTER Image URL Here')!important; groundwork-echo: no-repeat; background-size: embrace; } /* ---- Add the Quotation Symbol to the Quote Box ---- */ .et_quote_content blockquote p::before { font-family: Cardo; position: absolute; top: 16px; left: 5%; margin-left: -16px; border-radius: 31px; background: rgba(255, 255, 255, .0); font-size: 70px; font-color: #fff; content: "\201C" !important; } /* ---- Text Format Inside of quote ---- */ @media only screen and (min-width: 980px) { .single-postal service.single-format-quote blockquote p { font-size: 30px !of import; font-weight: 600 !of import; } } Find and upload an image to your media gallery (should exist around 700 ten 300). Then copy the url and paste in the CSS above where it says "ENTER Prototype URL HERE".
background-image: linear-gradient(rgba(0,0,0,0.3),rgba(0,0,0,0.iii)), url('ENTER IMAGE URL Hither'); Now check out your final issue:
Styling the Gallery Post Format
For the Gallery Post Format, make certain y'all have the Gallery Format selected for your post.

Adjacent, make sure to add together your 2000 10 600 featured image.
The Gallery Post Format allows you to create a gallery inside your mail service content from the media gallery.
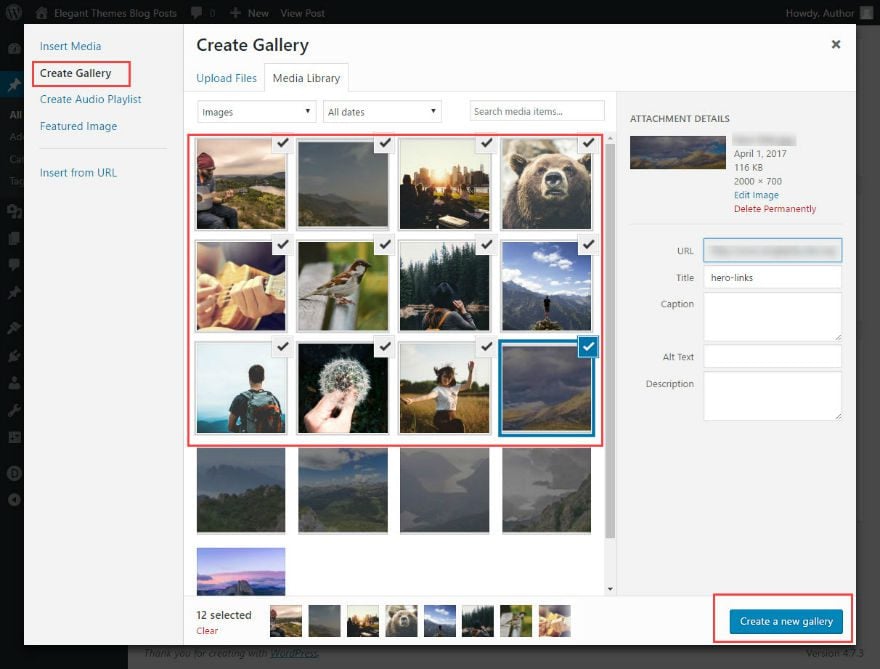
To create a gallery for your mail, get-go upload at least 6 images into your media gallery. The size of the image can vary but since the gallery has a lightbox effect that blows upwardly the images to total size, you can make the images nigh 1200 x 800.
Now select your images in the media gallery, select Create Gallery, and click the "Create a new gallery" push.
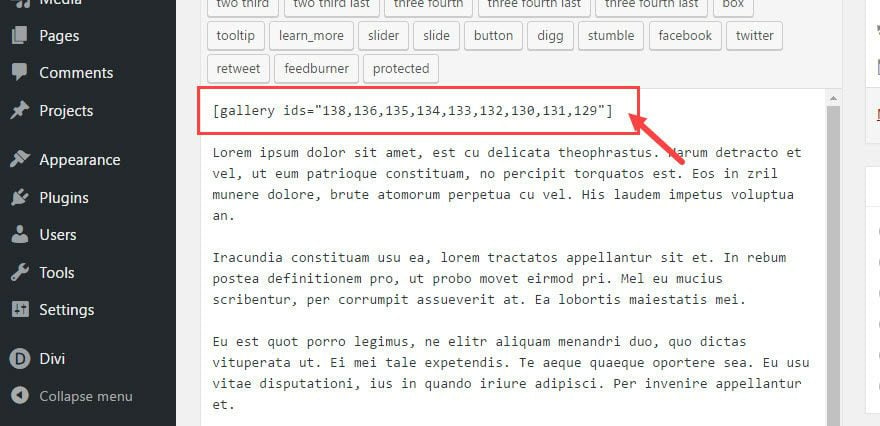
Now you should have a gallery shortcode in your content.
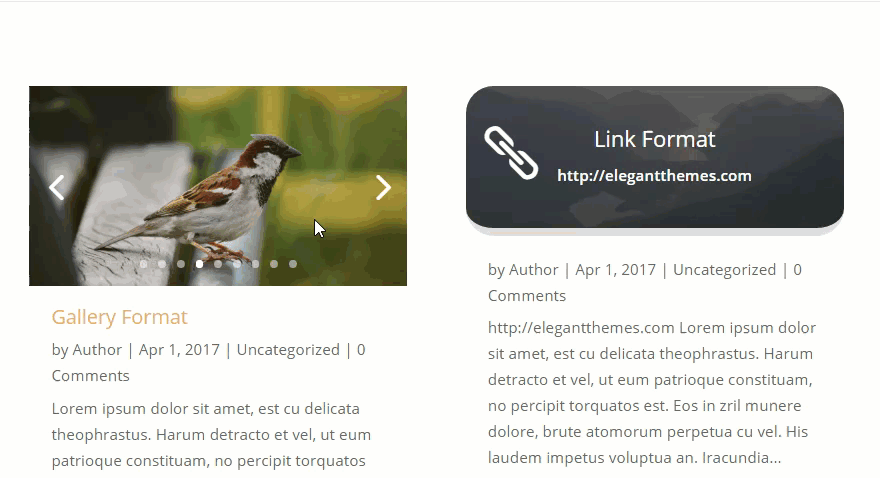
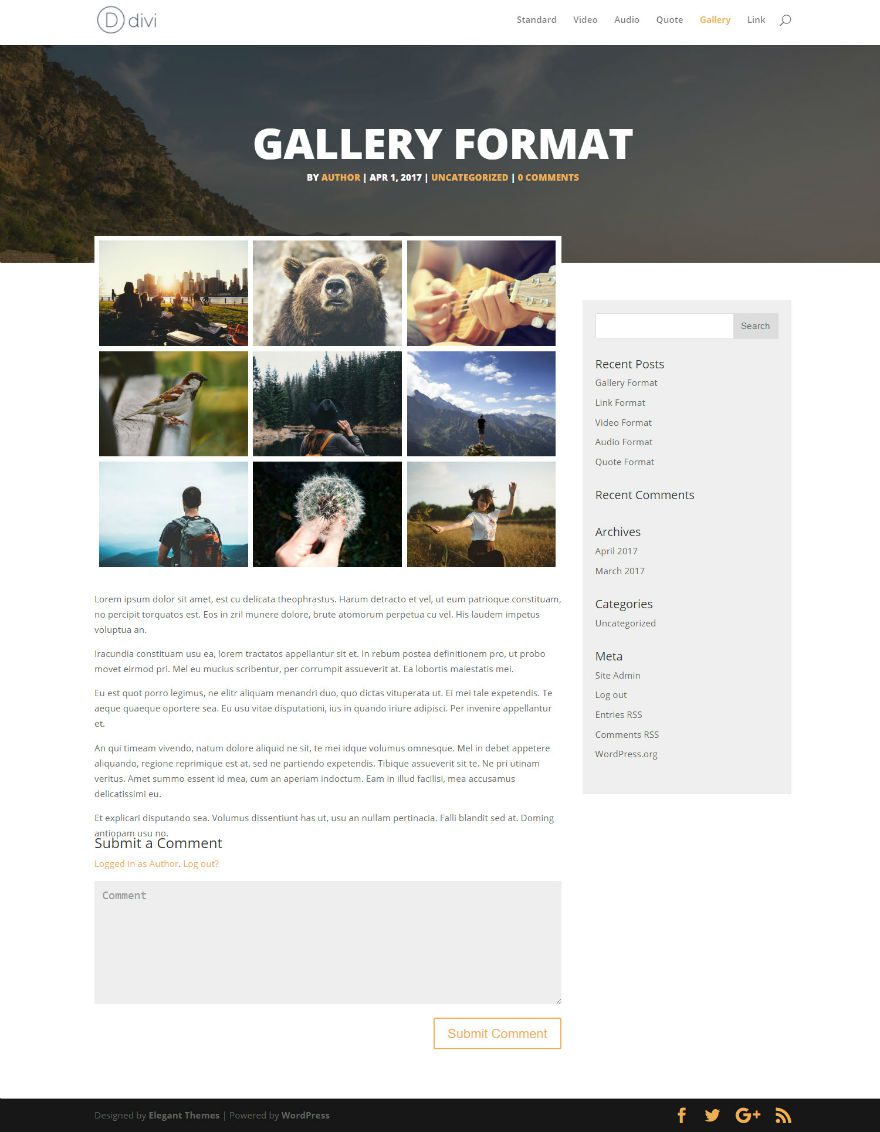
This gallery will be displayed on your post in a mosaic layout three columns broad. The gallery volition also replace the featured paradigm on your blog page with a slider of your gallery images.
Now go check out your postal service.

Let's add some CSS to the gallery to elevate information technology a little to overlap the hero department and change the margins effectually each of the images.
Get to Theme Customizer → Additional CSS and add the following custom CSS:
/* ---- Position & Style the Gallery to Overlap the Featured Image ---- */ @media only screen and (min-width: 980px) { .single-format-gallery .et_post_meta_wrapper { margin-top: -100px;} .et_post_gallery { z-index: 100; position: relative; border-top: 8px solid #fff !of import; border-left: 8px solid #fff !important; background: #fff !of import; } /* ---- Set Background Color, Margins & Padding for the Gallery Image ---- */ .et_gallery_item { margin: 0 0 0 0 !of import;} .et_gallery_item { width: 33.three%; margin: 0 0% 0% 0 !important; padding-right: 8px !important; background: #fff !important; padding-bottom: 8px !important; } } Now bank check out the final result.
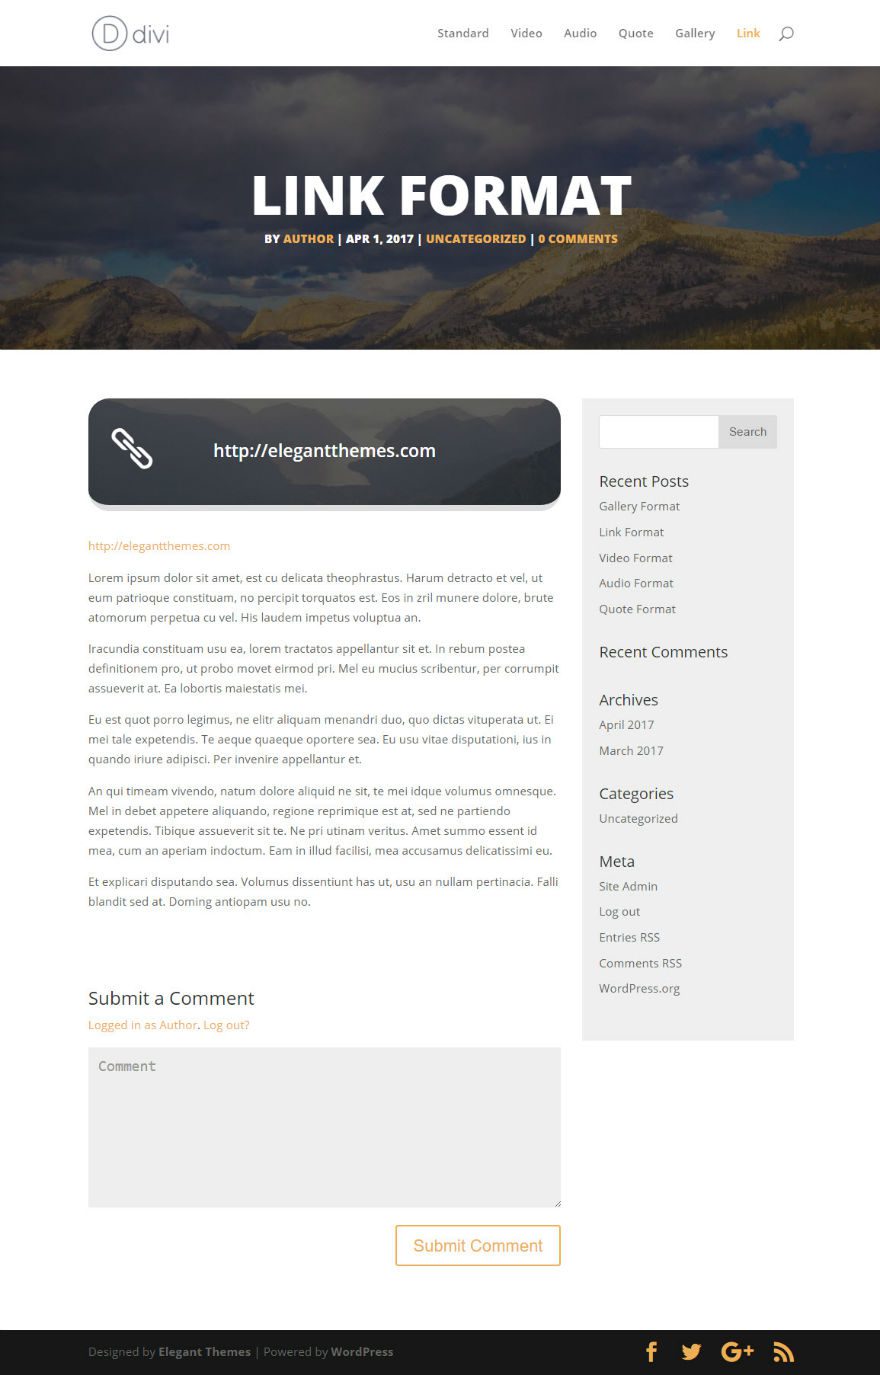
Styling the Link Post Format
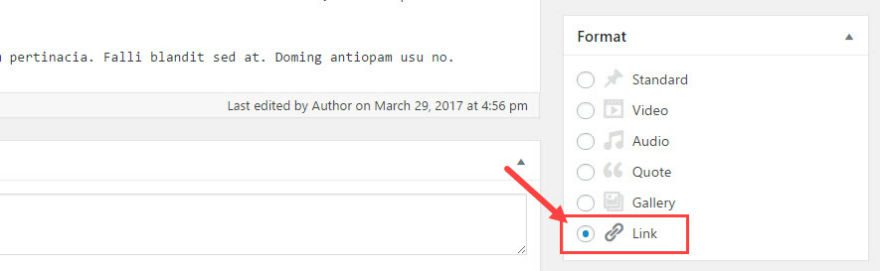
For the Link Mail service Format, make sure you have the Link Format selected for your post.
Next, add your 2000 x 600 featured paradigm to your post.
The Link Postal service Format take the get-go link in the mail service and displays it at the top of the content within a box. This custom link brandish as well replaces the featured epitome thumbnail for this mail service on your weblog page.
Go ahead and add a link to your post and check out the post design.

At present let's better the design a bit by adding a background image to the custom link box, and an icon to the left of the link url.
Become to Theme Customizer → Additional CSS and add together the following custom CSS:
/* ---- Add thick border to the left side and Lower the link box ---- */ .et_link_content { border-bottom: 8px solid #ddd; background-epitome: linear-slope(rgba(0,0,0,0.3), rgba(0,0,0,0.3)), url(ENTER Prototype URL HERE); background-size: encompass; groundwork-color:#edb059; border-radius: 25px; } /* ---- Font Settings within the Link box ---- */ .et_link_content a.et_link_main_url { font-size: 21px; font-weight: 600; colour: #fff !important;} /* ---- Link Symbol on the correct side ---- */ .et_link_content::earlier { font-family: "ETmodules"; position: accented; tiptop: 38%; left: 5%; margin-correct: -26px; border-radius: 31px; background: rgba(255, 255, 255, .0); font-size: 48px; color: #fff; content: "\e02c"; } /* ---- Position & Style the Gallery to Overlap the Featured Paradigm ---- */ @media only screen and (min-width: 980px) { .single-format-gallery .et_post_meta_wrapper { margin-top: -100px;} Then find and upload an image to your media gallery (should be around 700 x 300). Then copy the url and paste it in the CSS snippet you lot merely entered where it says "ENTER Image URL HERE".
groundwork-prototype: linear-gradient(rgba(0,0,0,0.3),rgba(0,0,0,0.iii)), url('ENTER IMAGE URL HERE'); Now Check out what the postal service looks similar.
That's information technology!
At present that we have all of our post formats designed, it's time to check out the cool layout information technology creates on the blog page. Yous tin can see how all the unlike post format featured items are displayed.
Note: you can display your blog using the default editor or the Divi Builder and the pattern will still piece of work.
Responsive?
All of the post formats are completely responsive a work well on all devices. Here is an example of what the Gallery Format post looks like when I compress change the screen size:
Terminal Thoughts
Congrats! Yous are all washed. I hope you enjoyed this 3 office series on customizing blog post formats. If anything, I promise you learned something valuable to take with y'all on your next project. Now that you have completed the tutorial, feel costless to experiment with your own design elements for your blog mail service formats.
Delight submit your comments below. I wait forrard to hearing from you.

How To Add Divi Builder To A Custom Template File,
Source: https://www.elegantthemes.com/blog/divi-resources/how-to-add-custom-templates-and-design-to-divis-blog-post-formats-part-3-of-3
Posted by: jacobsenthot1984.blogspot.com
0 Response to "How To Add Divi Builder To A Custom Template File"
Post a Comment